Use AI to summarize this article
Key points
In this article:
-
Introduction to the Variables feature in Figma and how it
enhances web design possibilities.
-
Step-by-step guide to creating Dark & Light Mode using color
variables in Figma.
-
How to centralize colors in collections, assign them to
components, and maintain consistency across your prototype.
-
Tips to switch between modes efficiently and provide optimal
visual experience for users.
Who is this article for?
This article is aimed at web designers, UI/UX professionals, front-end
developers, and anyone involved in prototyping who wants to enhance user experience by implementing
Dark & Light Mode efficiently using Figma variables.
The new Variables feature in Figma
The new Variables feature in Figma takes web design possibilities to new heights. With these variables, you can
create even more powerful prototypes by utilizing an integrated logic system. In this article, we will guide you
step by step to create a Dark & Light Mode using variables in Figma. This will enable you to provide an optimal
visual experience for your users based on their color preferences.
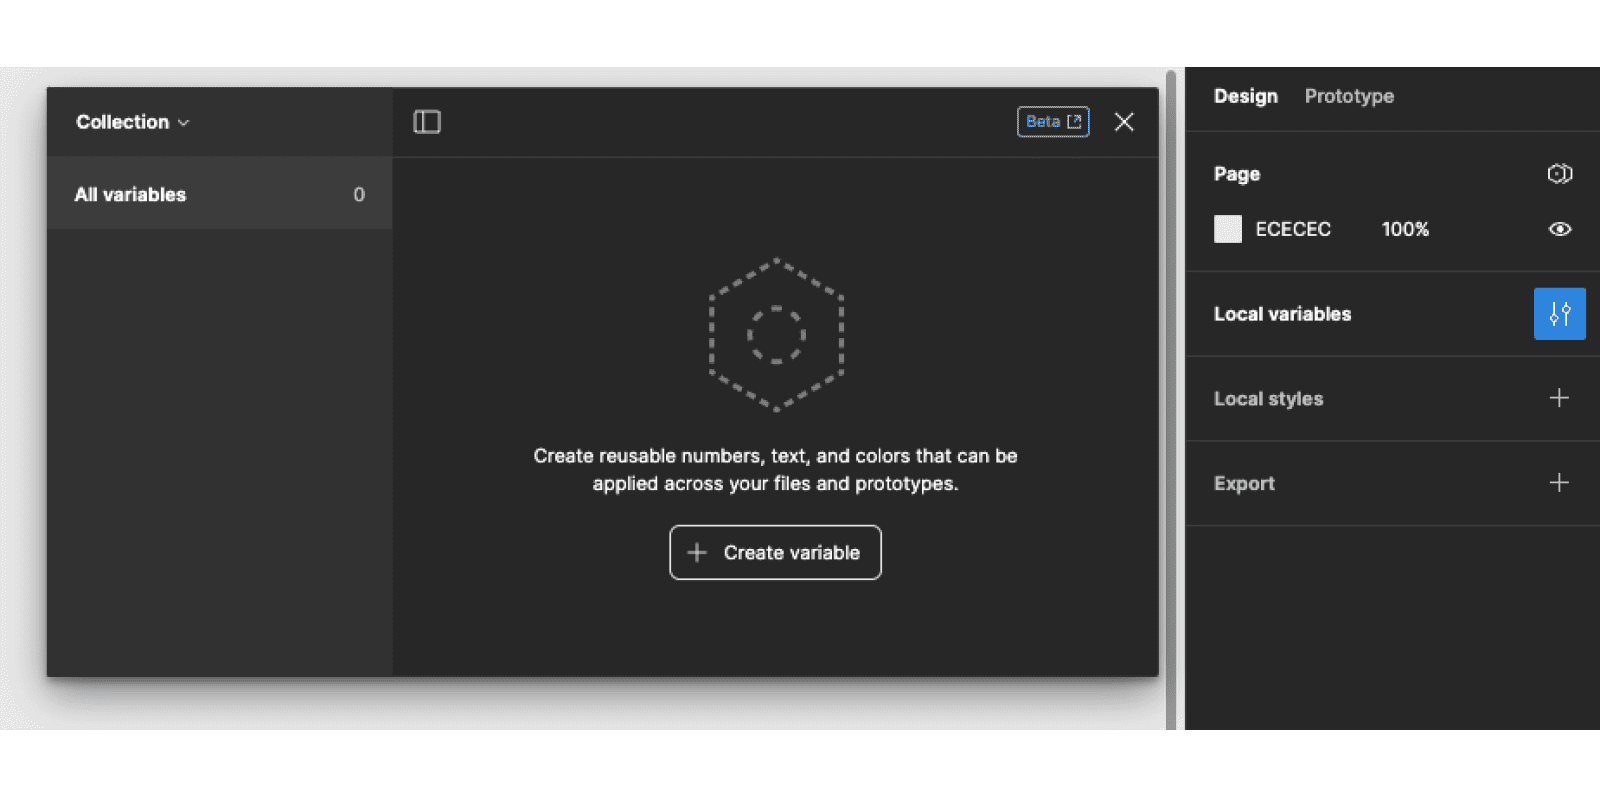
1. Adding Color Variables in Figma
Start by creating variants to define the different colors for your project. These variables will allow us to
centralize all styles used in the prototype and change colors with just one click. From the design panel, follow
these steps:
- Click on "Local Variables"
- In the variables table, click on "Create variable"
- Choose the "Color" variable
- In the Name column, assign a name to your color (e.g., 100 / 200 / 300 for shades of gray)
- In the Value column, assign a value to the color by adding a HEX code
- Group colors from the same family by selecting them, right-clicking, and clicking "New group with section"
- Rename your collection to "Colors"
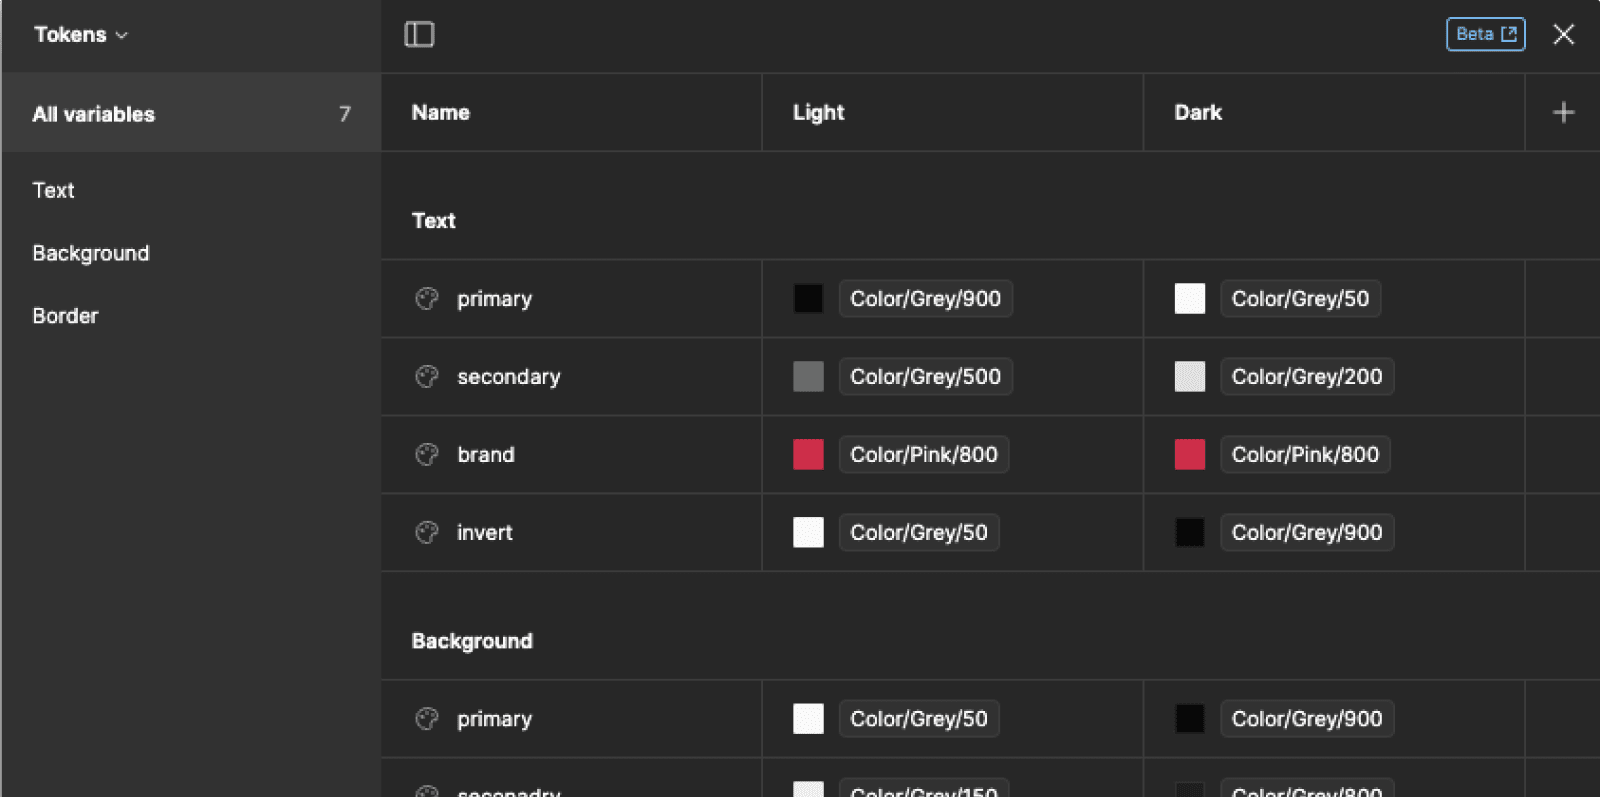
2. Create a Second Collection for Uniformity in the Prototype
To maintain uniformity in the prototype, designate primary and secondary colors for each graphic element: texts,
backgrounds, borders, etc. Create a new collection called
"Tokens" and
connect the colors from your "Colors" collection:
- Add variables for texts, backgrounds, and borders by defining "Primary" and "Secondary"
- Click on the color, go to "Libraries" and choose the color from the "Colors" collection
- Group your Primary and Secondary for Texts, Backgrounds, and Borders
3. Create a Second Mode in the Collection
Define new colors for a second mode (e.g., Light & Dark):
- From the "Tokens" collection, click the "+" icon to add a new column for the new mode
- Rename the two modes (e.g., "Light" and "Dark")
- For each row, customize the color for your Dark mode
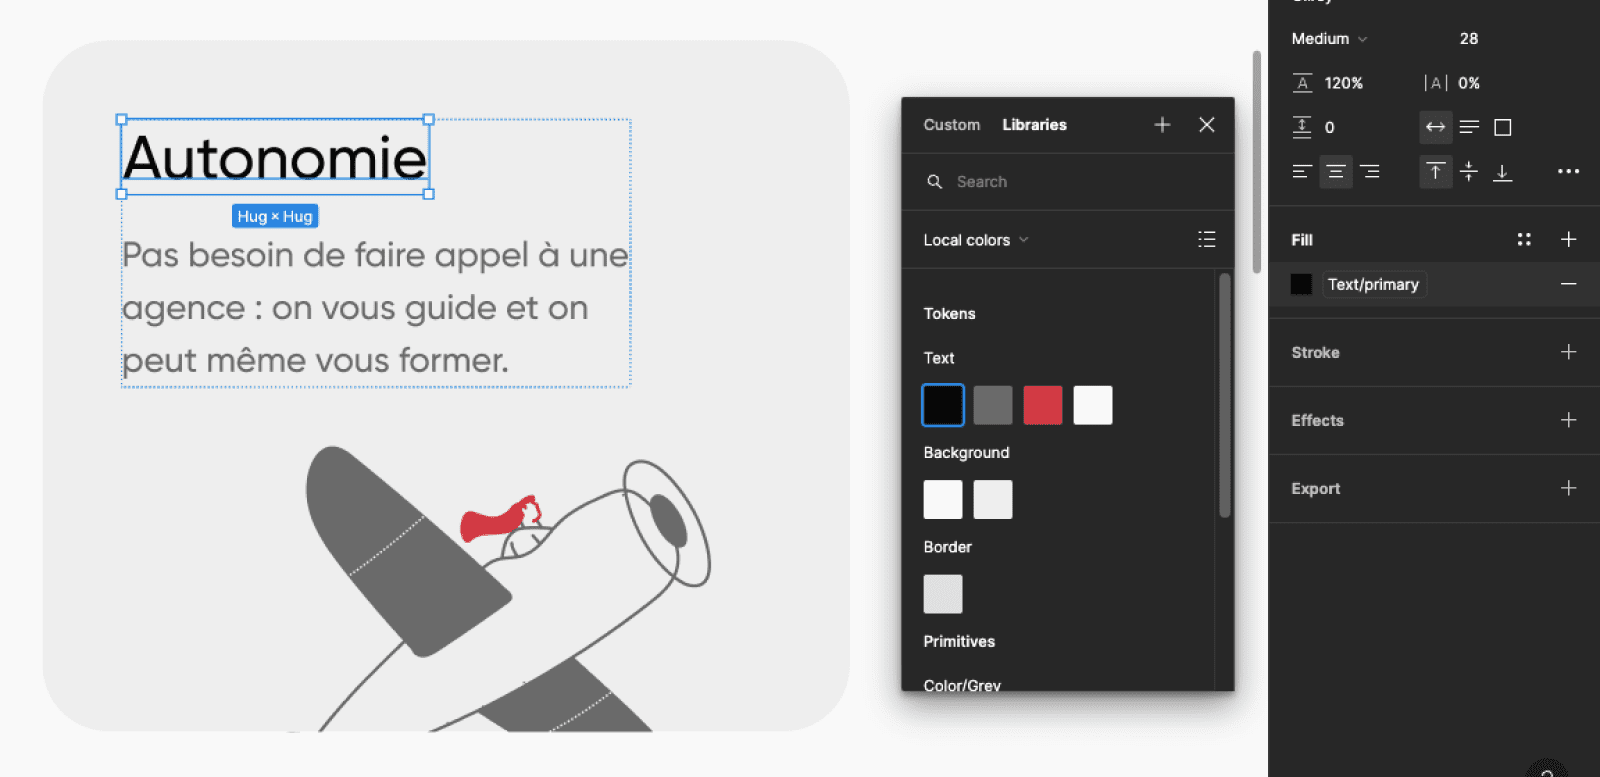
4. Connect the Variables to the Design
Connect variables to your Figma design:
- Select a component from your prototype
- Open the color panel and click "Libraries" if not set by default
- Assign the color variables from the "Tokens" collection to each component
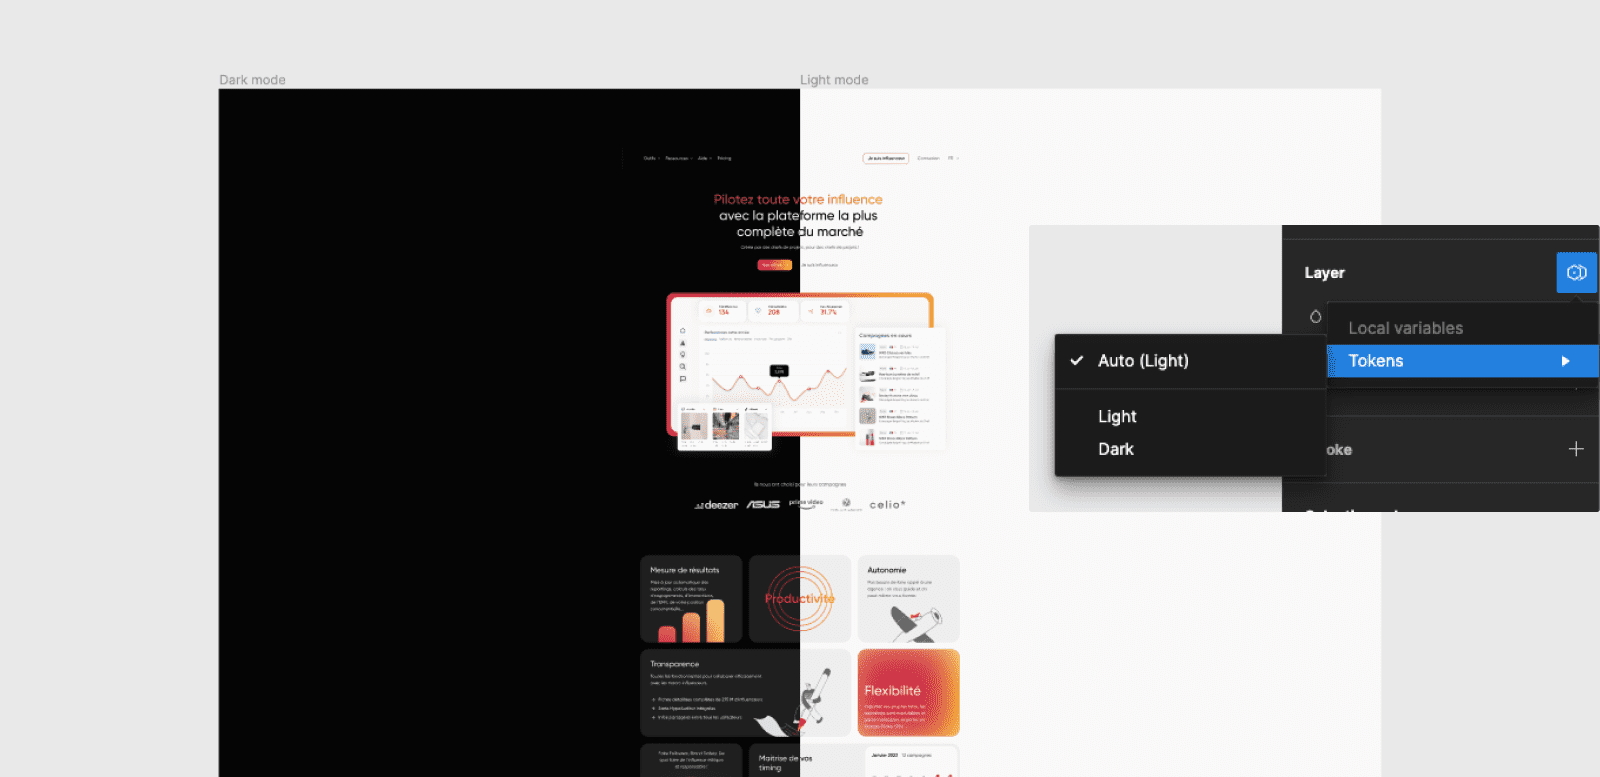
5. Switch from Dark to Light Mode
Your Dark & Light mode in Figma is ready:
- Go to layers in the design panel
- Click the "Variable" icon
- Open the "Tokens" collection
- Select either Dark or Light mode
- Alternatively, leave layers in auto mode to match the frame mode
With the power of variables in Figma, you can now create Dark & Light Mode prototypes more efficiently, enhancing
user experience by offering color preferences and pushing the boundaries of web design.

Uğur Alp Yıldız
Co-founder
Get in touch with our experts